About six years ago I created and installed a proprietary system for controlling our central heating. The setup was client-server, where the server was C# software running on a Win32 box, using RS232 to control a VIOM unit, which in turn activated relays to turn the zones on and off. There is no thermostatic control in this software, it is simply time based on/off programs. The main aim was to make a piece of software that would allow easy setting of time programs.
A few months ago I decided to rewrite my software for the pi. I did a little research to make sure that the pi could do all I needed, which is basically a bit of I/O and run 24/7, reliably. This has been running now for a few months without any problem.
A new application – Church hall
I noticed another application in that our local church hall has an outdated clock based heating system. In this system there are four zones, configured by switches that are inaccessible to users, and therefore mostly set to on. The timing is handled by one timer which controls all zones together. This sounds like an application that could be dramatically enhanced by my existing software.
GUI
At home I have no need for a display, as there are LEDs for system status, and a windows PC based GUI for program setting. In this new location I would need to create some sort of GUI to display on the unit.
I found eGalax touchscreens on eBay which could be bought from China for about £50. I ordered one and using some instructions I got the touchscreen configured and working. After some deliberating around JavaFX I decided that my simplest solution would be to go for another WinForms application, running on the pi using mono. I wrote a really simple WinForms app and put it onto the pi, with mono SimpleApp.exe up it popped on the display. Over a few iterations I tested some button handlers, and also TCP/IP code to connect to my java server software, and it all worked as expected.
When I discovered mono worked so well I took the bold approach of just linking to my existing classes for communication and programming used in my regular WinForm application, which have built-in resilience if the server goes down, useful enums, and code for handling all the time programming required. I was pleased to see that it all worked.
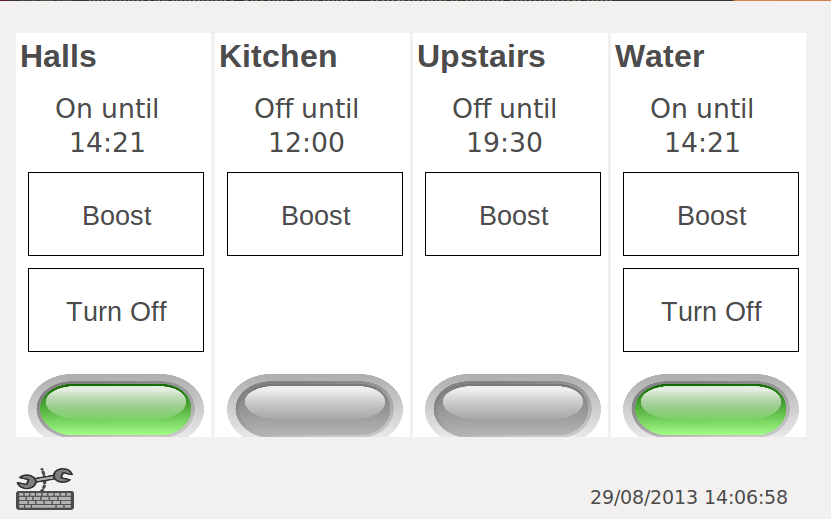
With the mechanics in place, it came to the more difficult aspect of designing the GUI. I went through quite a few iterations on paper to decide what was required on the screen, and how it should be laid out, and in the end decided that there should be four horizontal panels side-by-side, one for each zone. I would stick with my familiar paradigm of displaying the zone name at the top, and then text showing if the zone is on or off, and what time the next event is at. Below this is a button to boost and a button to turn off. At the bottom there is an image which shows grey when the zone is off, and green when it is on.
The next problem to solve was how to easily set programs. After a few iterations I came up with a dialog for that too, that is accessible from a settings icon on the main screen.
Programs can be added, removed or amended from this setting screen, which is designed to allow easy access to all programs. It could be made more beautiful, but as it will only be administrators who will have access to it, I don’t really want to put too much effort into the aesthetics.

Real Time Clock
Another difference in this location is that there is no internet access. The Raspberry Pi usually gets its time from the network, but it is possible to add a real time clock (RTC) module, which keeps a battery backup of the time. I bought a RTC module, and followed instructions on the internet to enable it, quite easy.
Network
There is no network in this location, however if I’m doing maintenance I don’t want to have to carry a network cable. I decided to set the Pi up as an access point (AP), and following instructions from the internet this turned out to be quite easy too. The Pi boots up into AP mode, which means if I scan for networks with my laptop I can join its network, and while there is no internet access, I can browse its folders via samba, and connect to the shell using ssh.
The lack of internet connection quickly posed problems, as there is no way to even install new modules. I decided to try setting my wireless temporarily as a client, and using my phone as an access point. Then I could visit the location with a laptop, connect the laptop and the Pi to the phone and they would be on their own private network. I initially hit a problem in that the HTC (or android) only routes data on certain ports, and ssh on port 22 wouldn't work. I quickly found that ssh could be configured on more than one port, so I set it to run on 443 as well, hoping that it would be routed, and this worked fine. The only problem is that the phone seems quite slow as a router, but at least it is an easy internet solution.
Hardware
One of the challenges was to put the whole thing into a nice box. I asked a friend to look for a box for me, and he came back with an IP65 rated box that ended up being a great job. I used the metal part from some old floppy drives to mount the circuit boards on, and it made the inside of the box relatively tidy.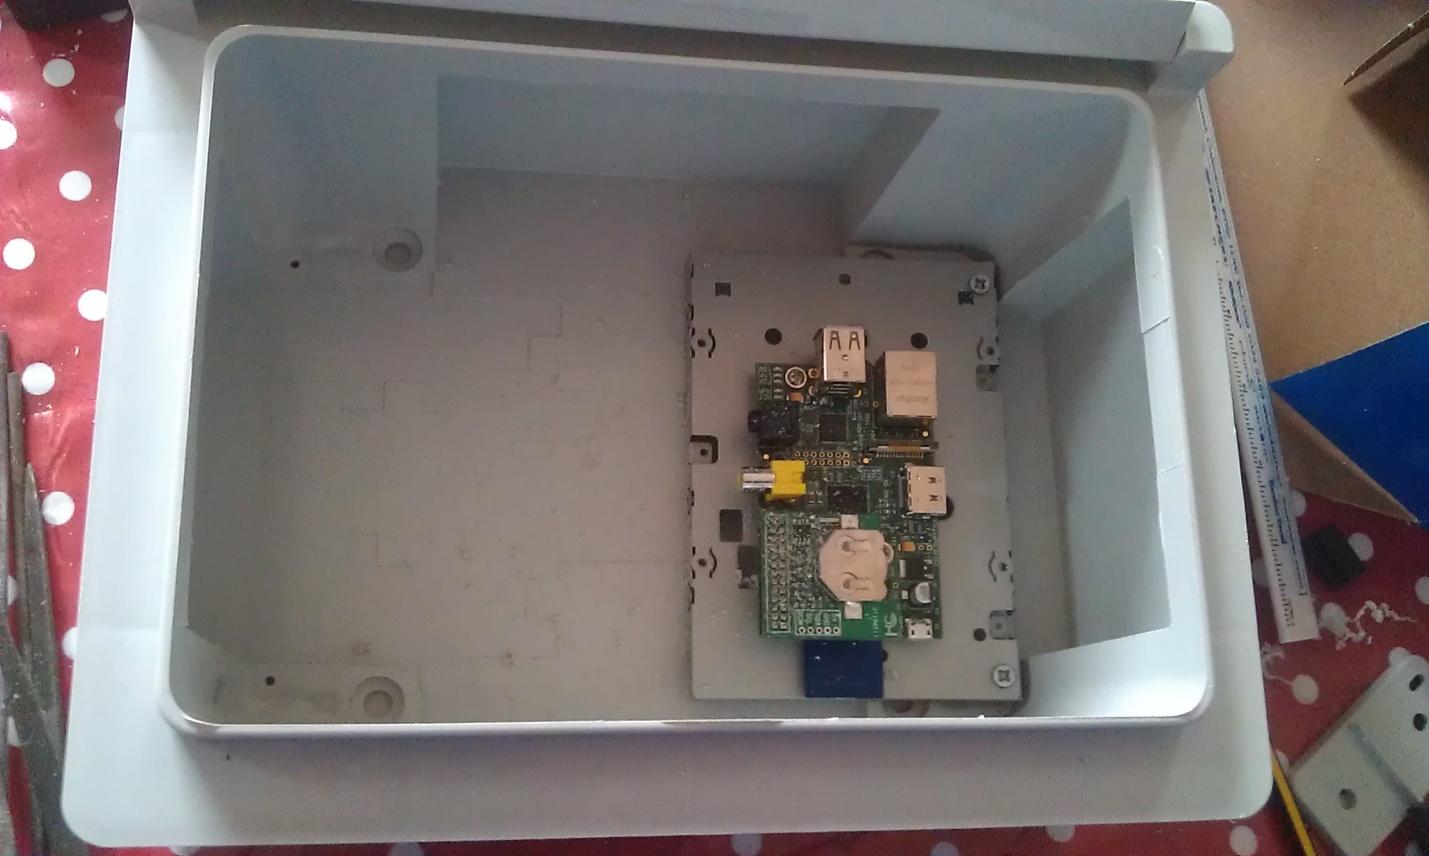
The screen was difficult to mount, as it seemed to be designed to fit inside a bezel. However, I found some old clips, and superglued them into slots in the box to make a mounting for the screen. This worked out quite neat, and I fed the ribbon cable from the screen and touchscreen overlay through slot to the controller boards which I mounted on the inside of the door.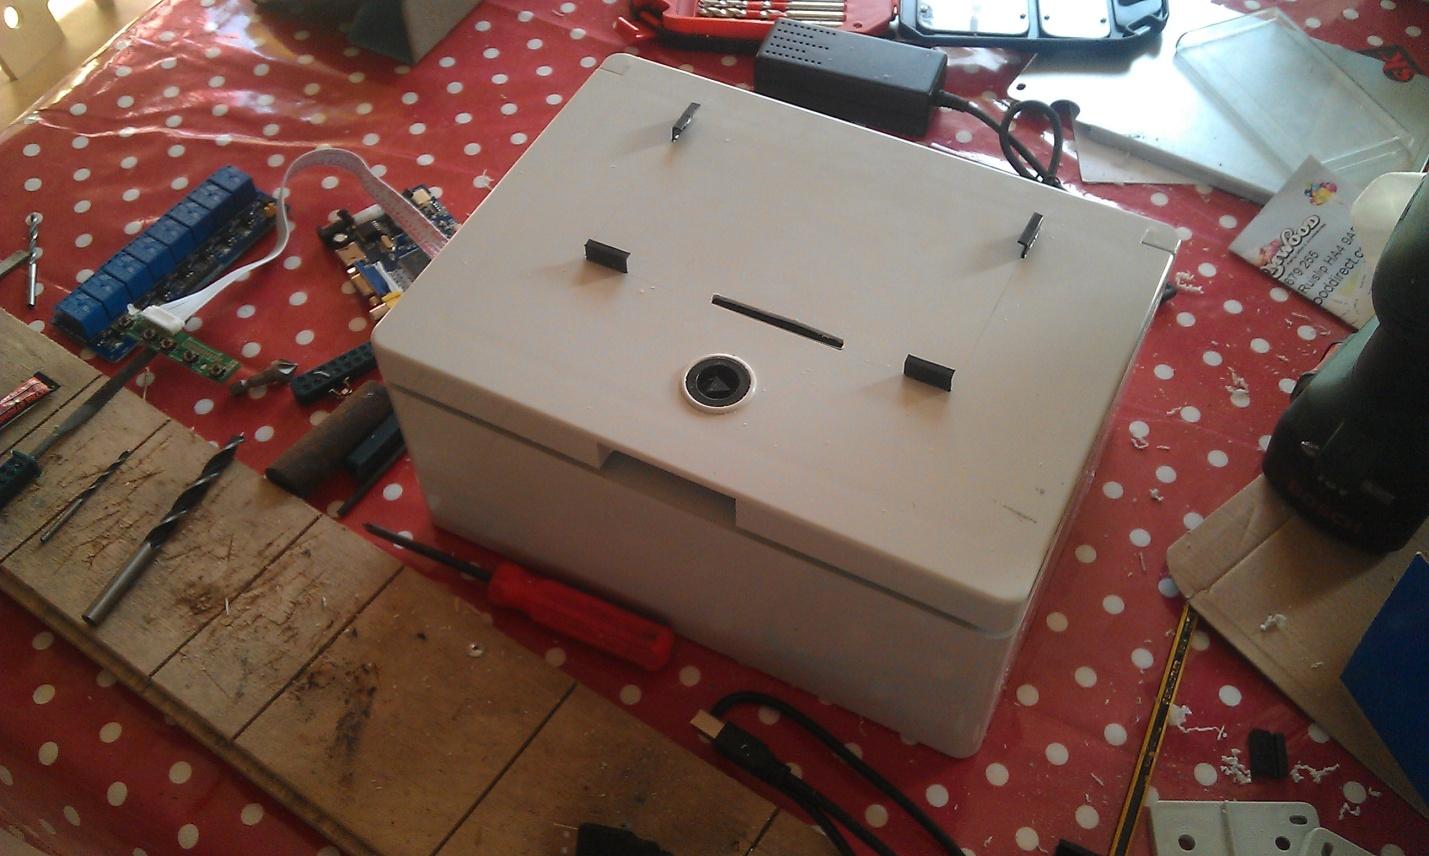
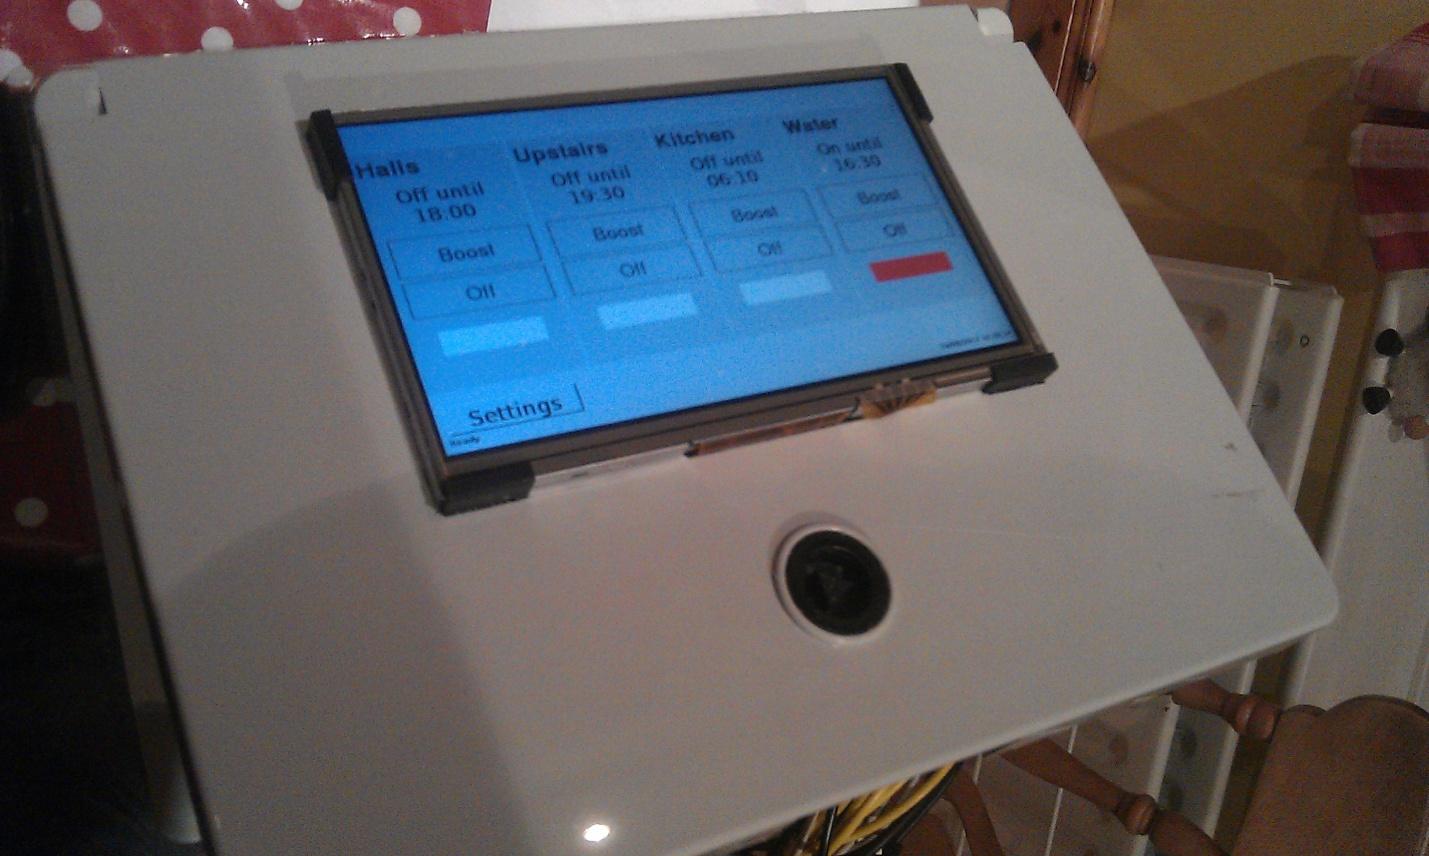
Installed and running an initial revision of the software
Screensaver
By default the Raspberry Pi screen goes blank after 10 minutes, but the problem is that touching the screen to bring it on also activates whatever you touched. If someone touches the boost or off buttons, as well as bringing the screen on it would also perform the action. Installing xscreensaver (run xscreensaver-demo to configure it) solves this because after configuring it to go blank after 10 minutes touching it doesn't activate the buttons below. It is still a sub-optimal solution though as it doesn't switch the screen off, it only makes it go blank.
Mouse pointer
Touching the screen is exactly the same as clicking with a mouse. The problem is that this action moves the mouse pointer, which can often obscure the activated control. I found that a little utility called unclutter could help with this, hiding the mouse a few milliseconds after the click.
Conclusion
The system has been installed and running for about a week now, and initial feedback seems positive. However, the real test will be the longer term, where it will run many programs over many weeks, months and hopefully years. The Raspberry Pi seems like a capable little computer for this sort of task.
6 comments:
Hi Simon,
I have a similar setup and I'm having problems with the touch events.
My touchscreen is also eGalax and it works well on X11 but not on JAVA FX apps. It seems the driver is generating the events correctly because if I do "cat /dev/input/event4" it shows me some stuff every time I touch the screen.
Do you have some ideia on how to make it work on JAVA FX? Please, help me. I'm getting crazy with this issue.
Thank you,
Sergio Soares (Brazil)
Hi Sergio,
I am sorry I have no experience of Java FX, apart from trying it out, I can't even remember if I tried it with the touchscreen.
However, if the touch works well with X11, surely Java FX apps just run within the X11 environment? This should be the same as my c# mono app - it runs under X11, so X11 is responsible to pass the events to it.
Your touchscreen should behave exactly the same as a mouse. Remember that your touchscreen is not really a touch input device in the more modern sense, so you wont get events like swipe etc, you'll just get mouse events, the same as if you were using a mouse.
Does your JavaFx program work with a mouse attached to the pi?
Thank you very much for your answer.
Yes, it works quite well with a mouse on my JAVA FX app. But when I touch, the pointer does not move as a mouse.
It seems JAVA FX is dealing with my screen as if it is a modern touchscreen. I want it to deal with my touchscreen as a simple mouse, is there a way we can convert it?
My issue is exactly the same of this one: http://qt-project.org/forums/viewthread/21126
They made it work for QT5 using something with evdevmouse but I need it to JAVA FX =((
Thanks,
Sergio.
wow, that's certainly an interesting problem, I'm sorry I can't offer some more advice, as I've not come across it.
Sérgio, This might help :
http://www.jensd.de/wordpress/?p=845
Post a Comment